Use-case 7: How To Provision Exchange Mailbox, Skype For Business And O365 Accounts While Provisioning The Active Directory User Accounts For Employees
When a new employee joins the organization, you will have to create the user account and possibly other accounts like, a mailbox for the user, a Skype for business account and an O365 account. Now, this is just for one account. Imagine you are on a bulk new employee account provisioning spree. Envision all the tedious work of creating each accounts, separately, in each of those modules, for each of these newbies. Remember about the bulk employee provisioning spree on my earlier lines... huff!!

User Creation Templates is a perfect remedy to integrate other Microsoft Services with Active Directory user account provisioning. This simultaneously creates others accounts for an employee, along with his AD account. Saves time, doesn't it?
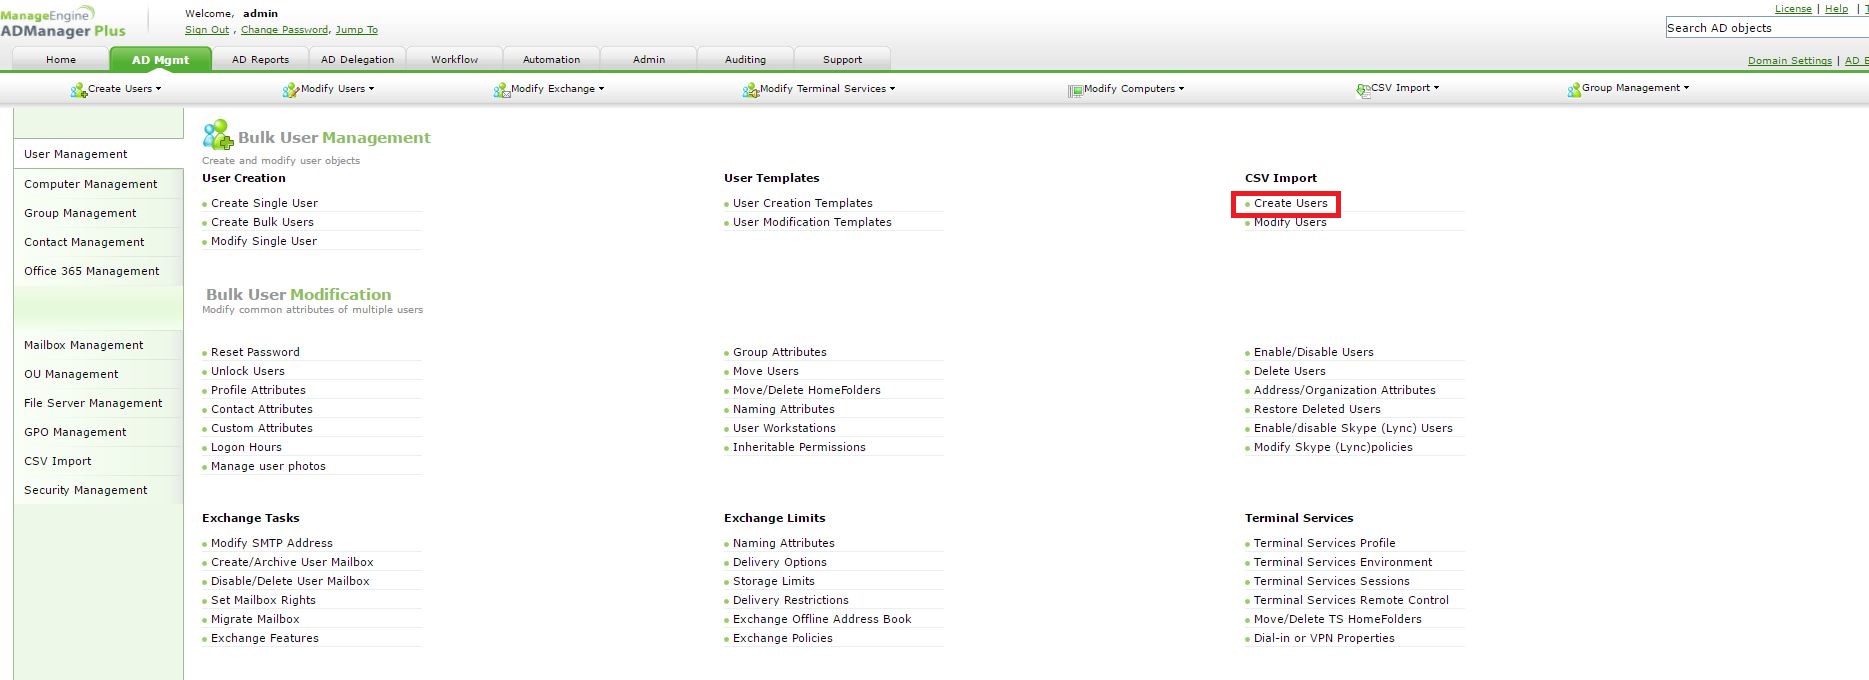
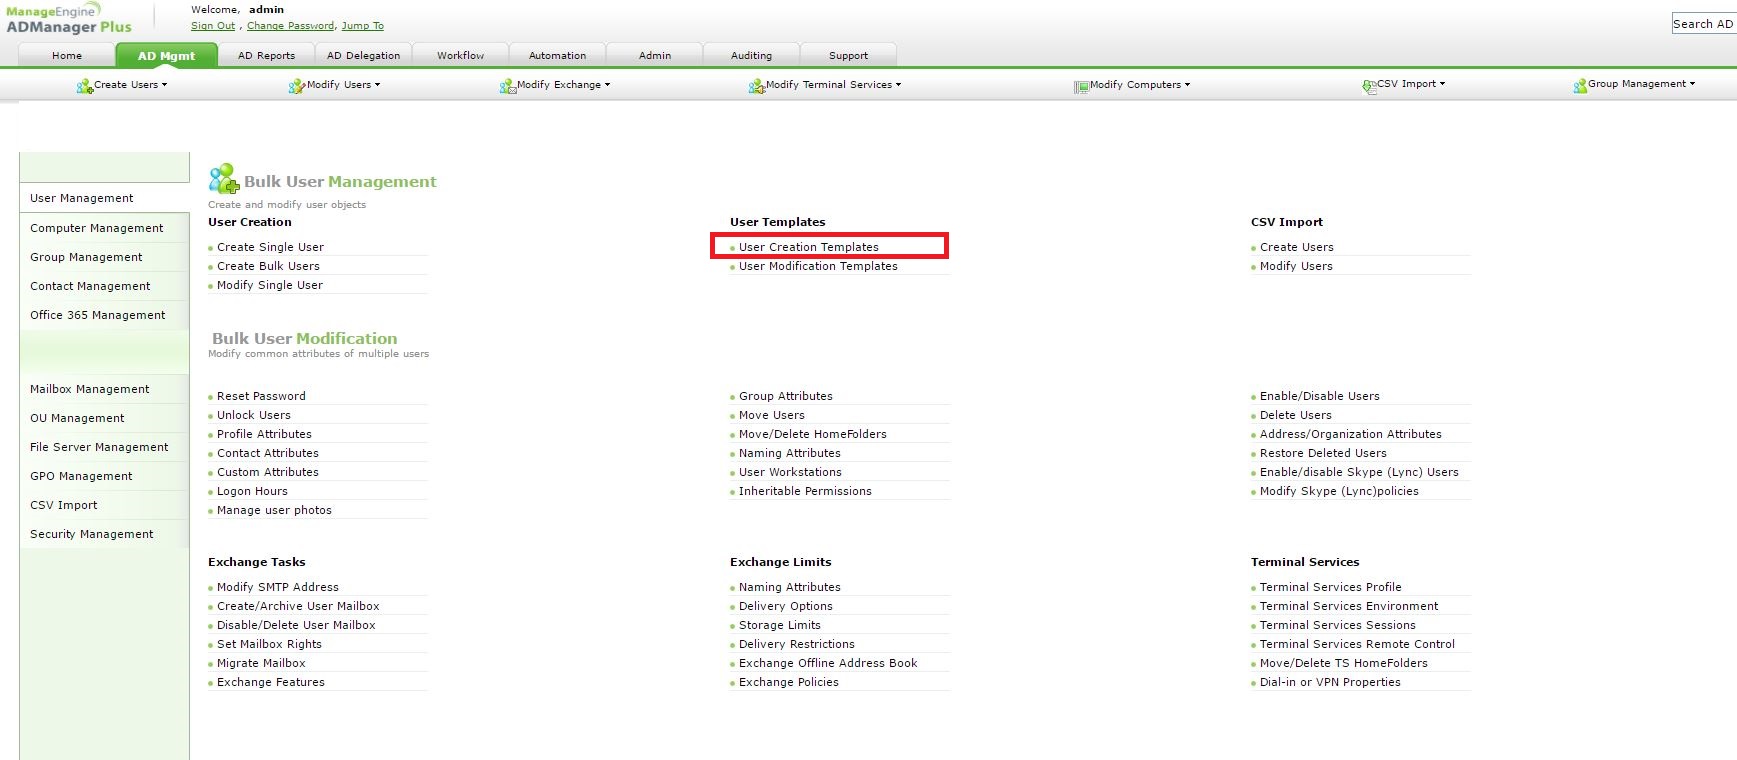
Step 1: Kindly go to AD Mgmt --> User Management --> Bulk User Management --> User Creation Templates.
Step 2: Click on Create new template.
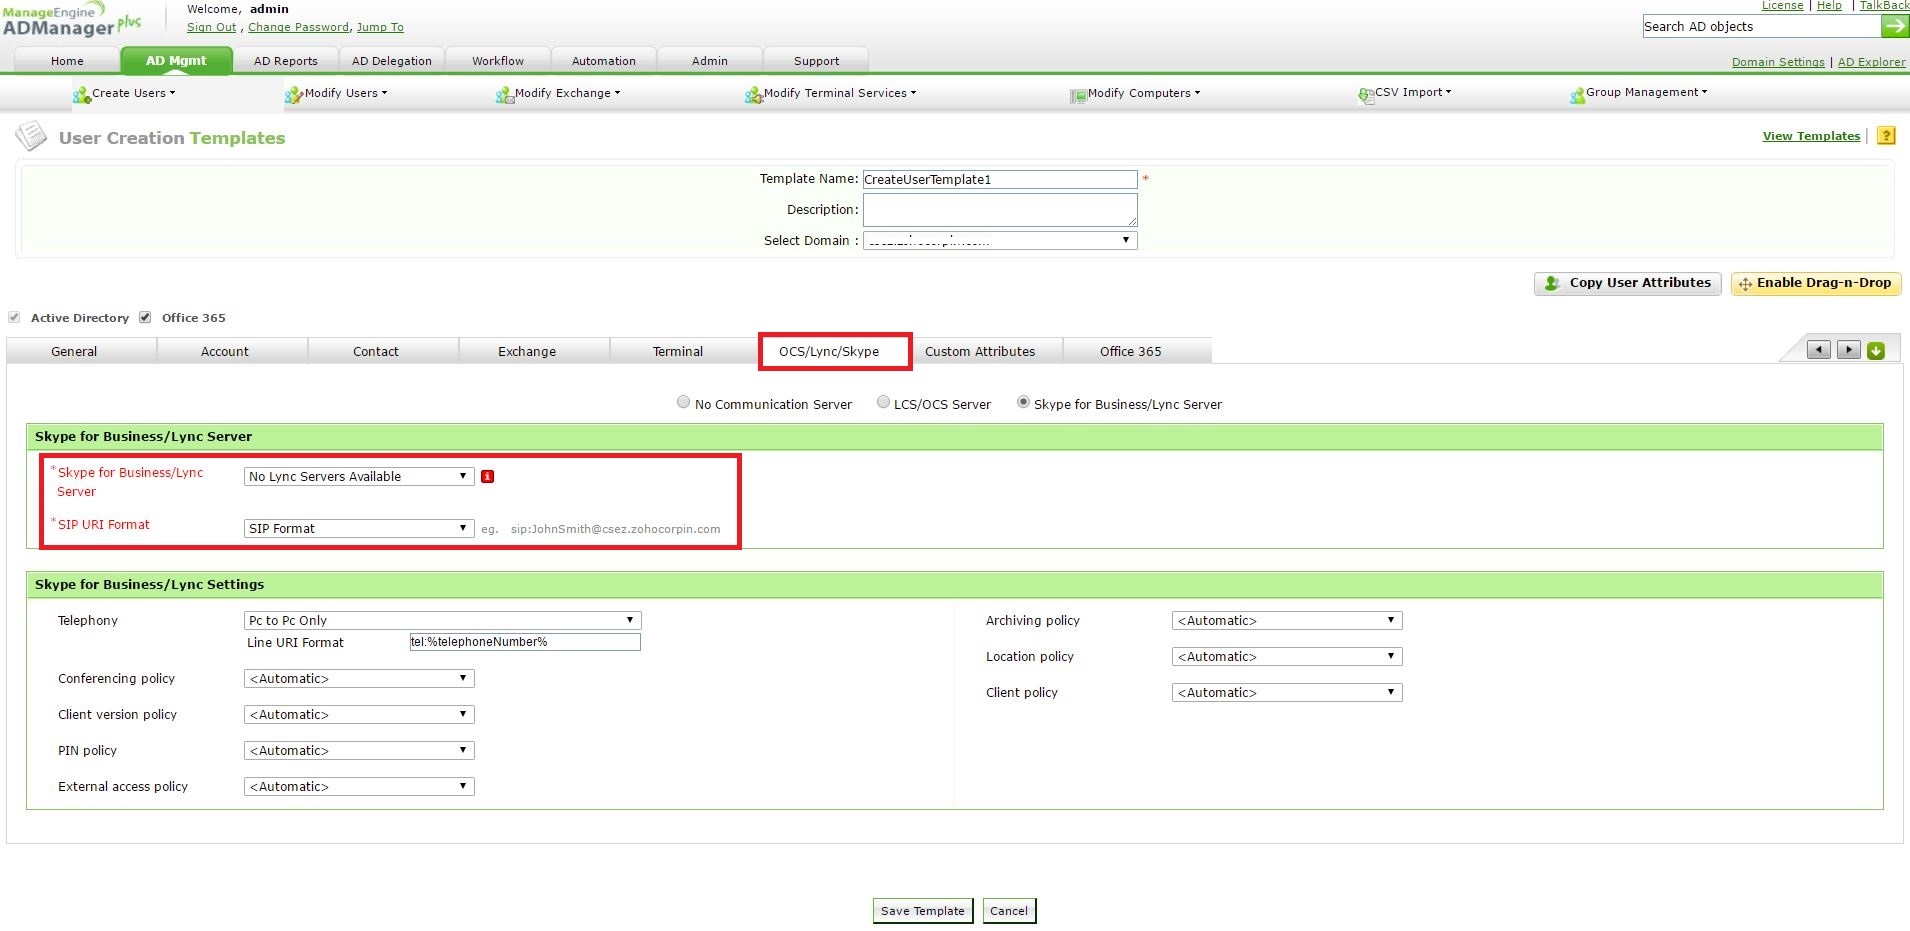
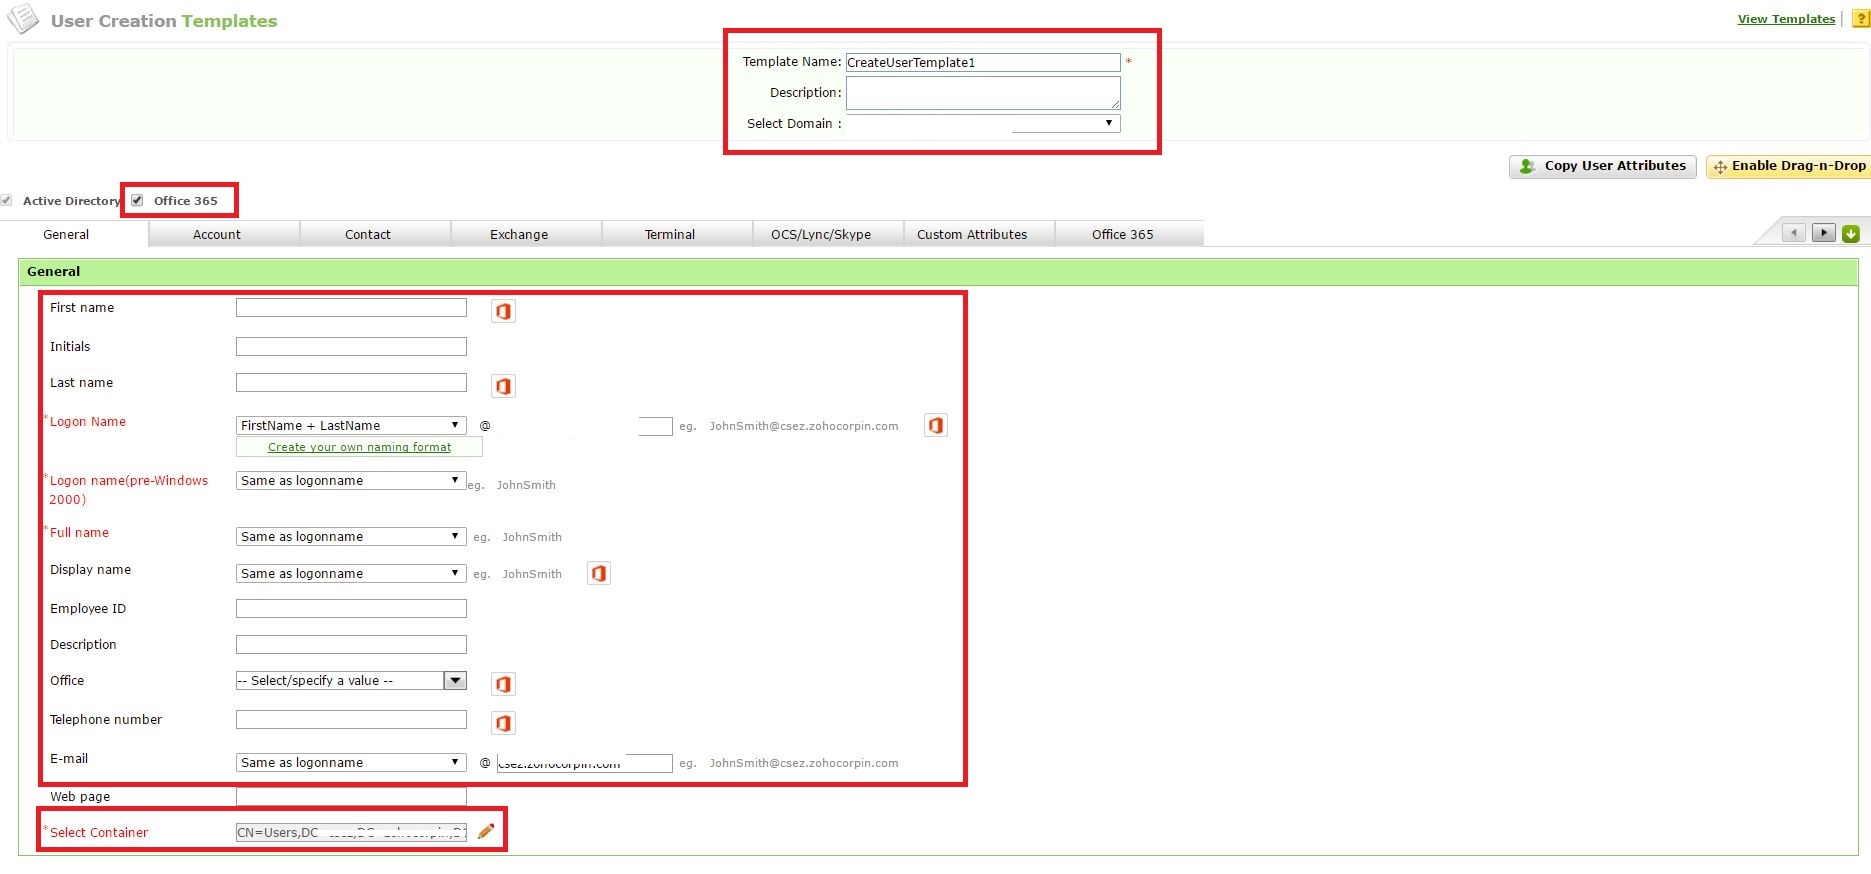
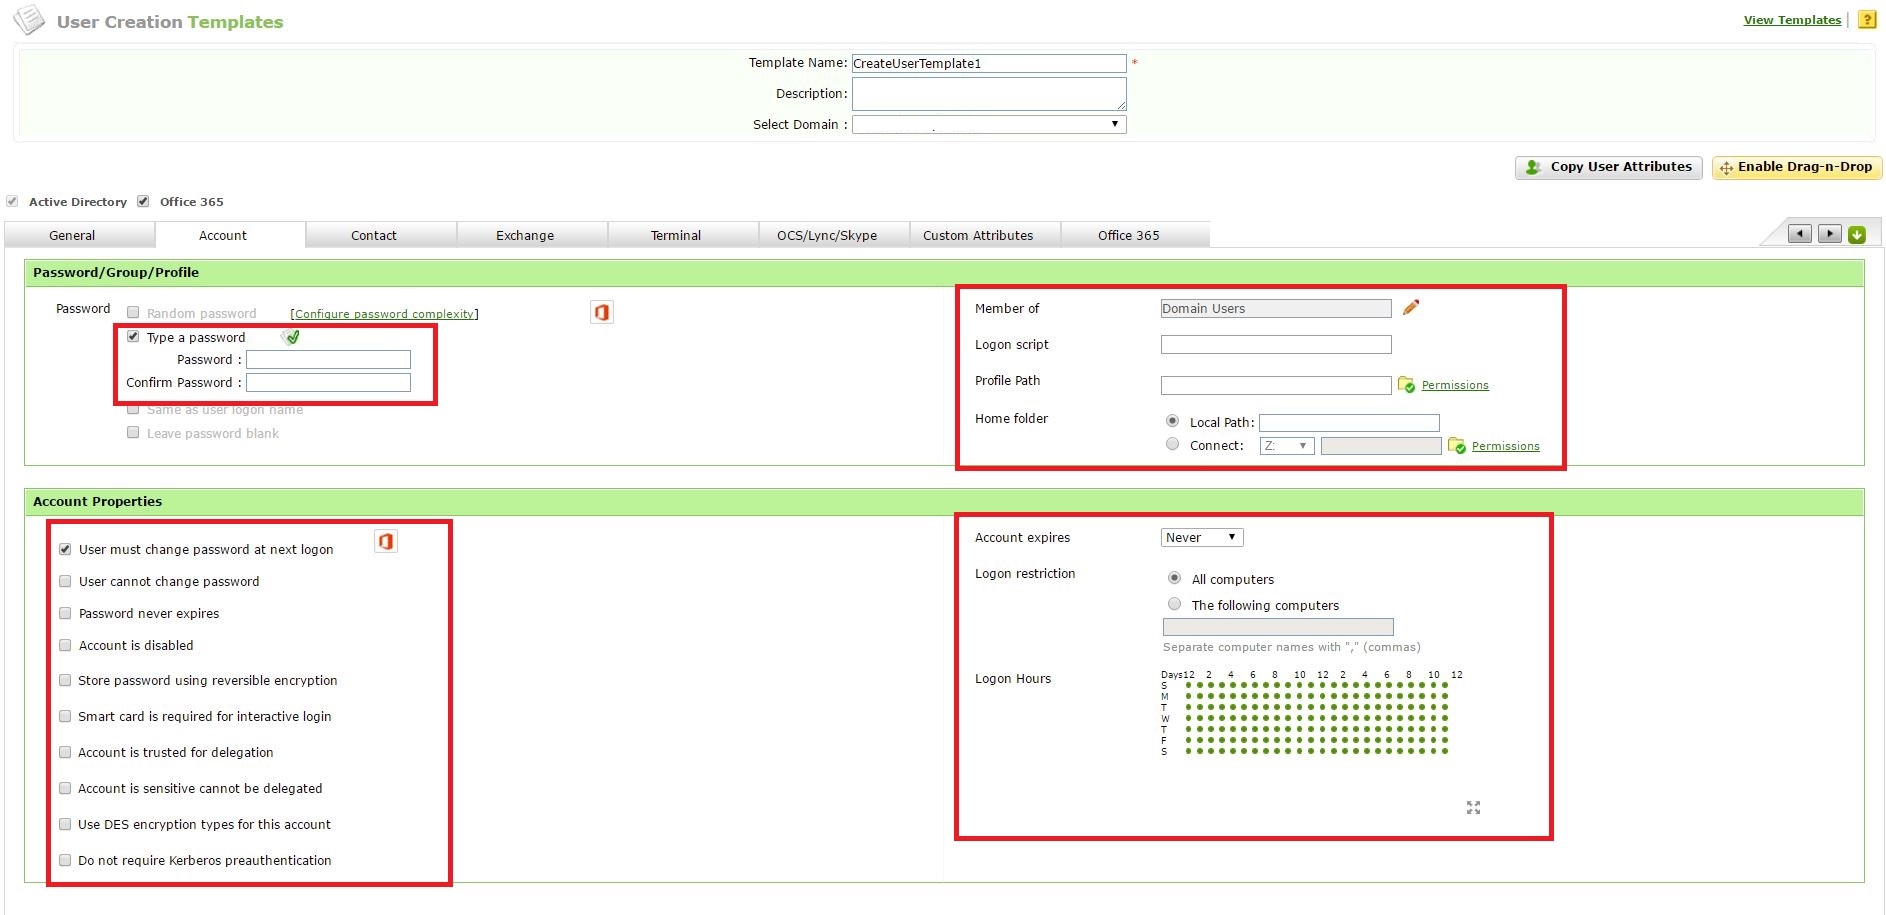
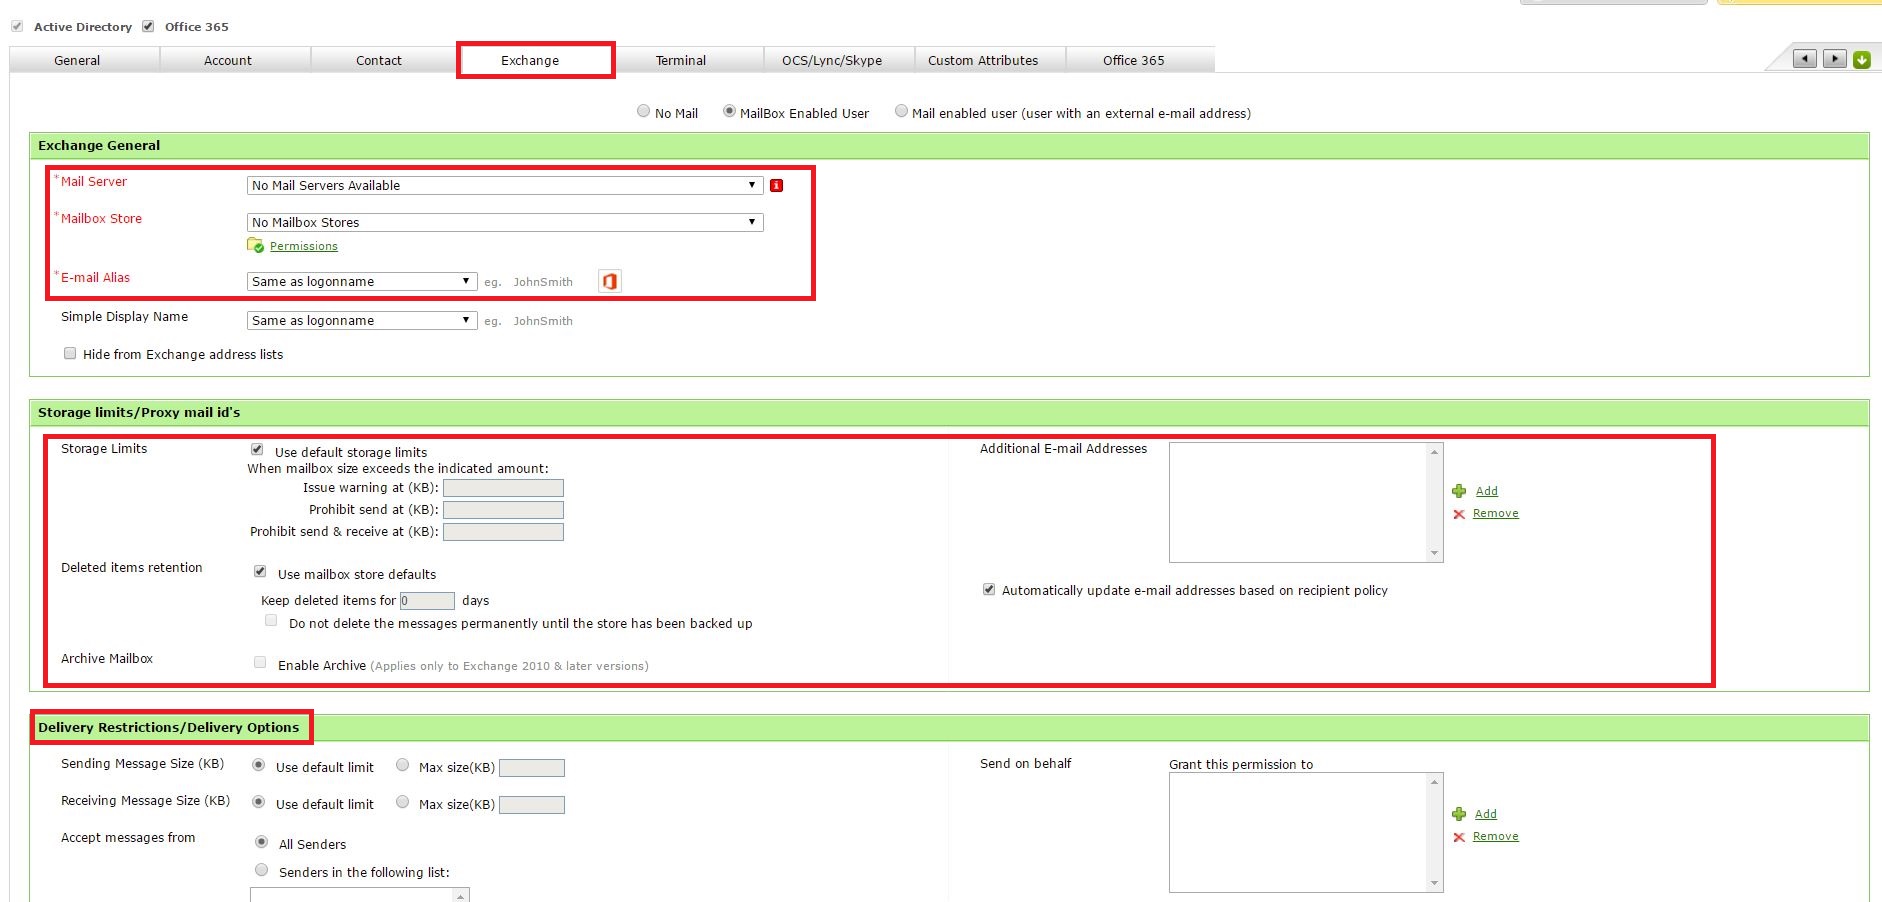
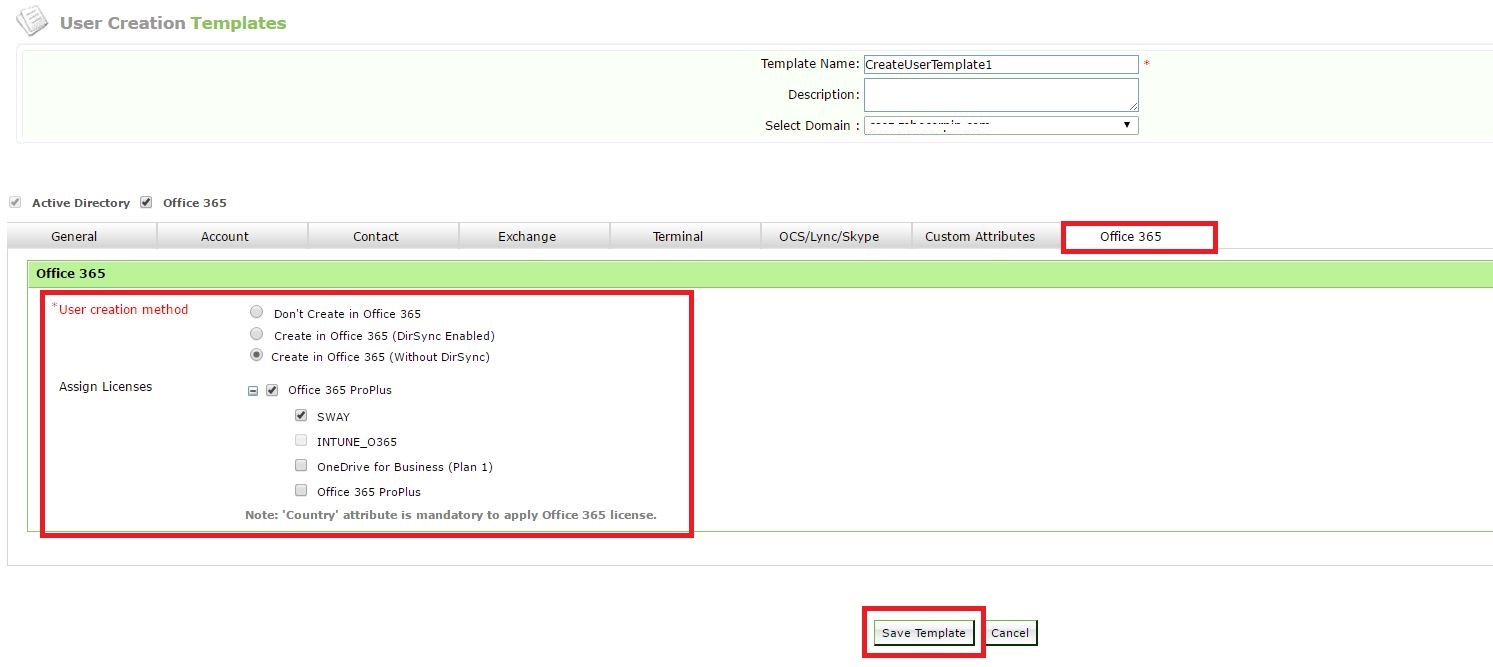
Step 3: Choose the domain and fill the Template Name. On the General tab, you can choose a naming format that populates various naming attributes and choose a container under which the user will be created. On the Account tab, you can pre-fill a password with which the user will be created and choose a home folder location, logon restriction, etc. On the Exchange tab, you can fill information pertaining to the mailbox creation for the user, set mailbox size, place mail restrictions, policies, etc. On the OCS/Lync/Skype tab, you can select you SFB/Lync server and populate a SIP address format. Also, you can choose various Lync settings and policies. On the O365, you can enable dirsync and assign licenses with which the user will be created.
Click on Save Template, once you're done.
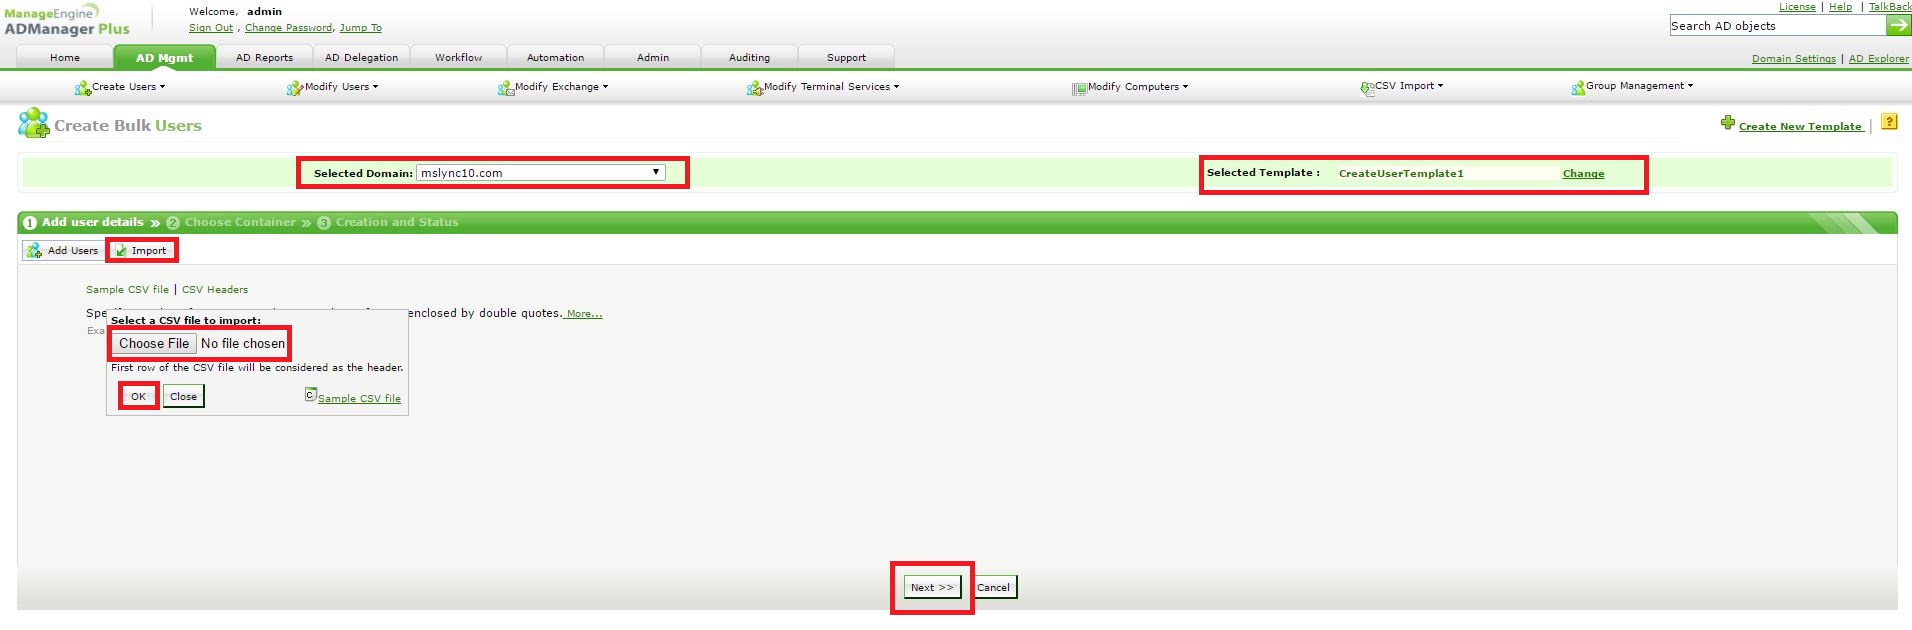
Step 4: Go to AD Mgmt --> User Management --> Bulk User Management --> CSV Import --> Create Users.